This article will give you a short guide on how to build your own Fir Bolg chariot out of the basic chassis of the regular Gael model.
At first, there is always "the idea". This one starts with me finishing my King of the Wild. Together with his pack of dogs, he's the last addition for my Gael army, making it pretty much complete.
The usual question that follows is: "What's next?"
While I'm pondering this question, my eyes turn to a long neglected part of my Celtos addiction - The Un-living Fir Bolg! While I'm the proud owner of a solid core of Skeleton, Zombie and Flesh eater infantry units, my cursed mini(on)s of Anwyn seriously lack something big, bad and hard hitting. While leaving through the army list for inspiration, my attention turns to chariots. Big, fast and nasty, these war-machines are truly kings of the battlefield. Unfortunately as I write this article, only the Gael can claim a chariot model and have more than once used this to win the day.
So my decision is made: A chariot will strengthen my Fir Bolg army!
The un-dead are basically scavengers and will gladly use everything that is left behind on a battlefield. Since most Fir Bolg claim the bodies of fallen warriors, it is certainly not a step too far to claim a wrecked chariot to fight again as well. So I envision the chariot as a patched up vehicle, bolstered and held together by black magic and sinister rituals, drawn by un-dead horses and crewed by Fir Bolg champions.
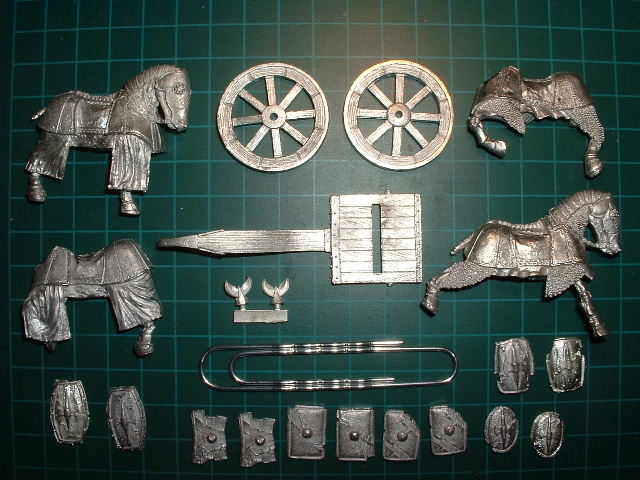
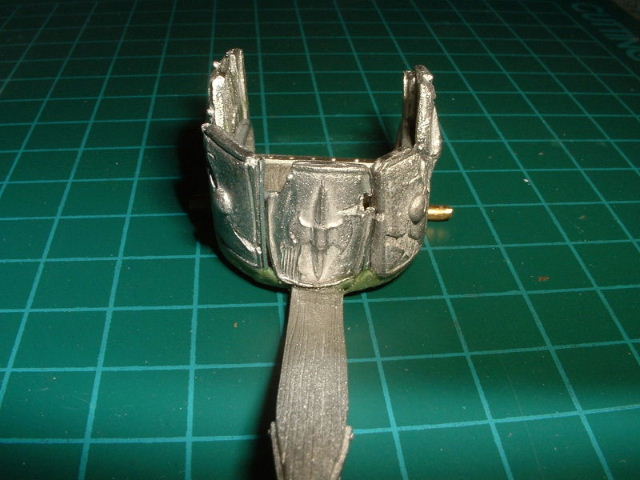
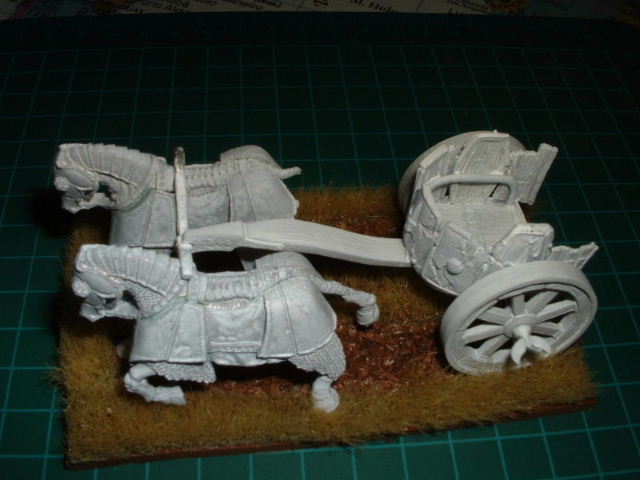
I decide to use the chassis and wheels of the Gael chariot as base for the model, because it gives a sturdy platform for all other modifications I'm going to do.
Un-dead horses are taken from the Fir Bolg cavalry models. Since the saddle is modelled as part of the rider, you can use them right away, without modifications.
Now for the tricky bit: I'm not a big fan of the Gael chariots side frames. In my opinion, the vehicle looks too much like a converted civilian cart, than a war machine. When thinking about chariots, I usually envision the classic Egyptian, Persian or Greek designs that are more rounded and have only one open side at the rear.
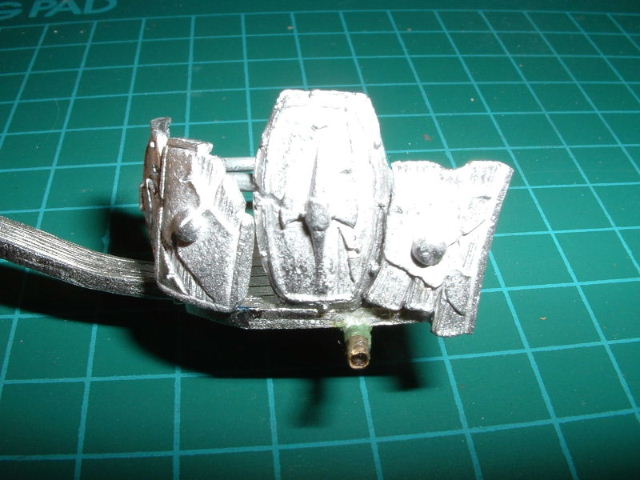
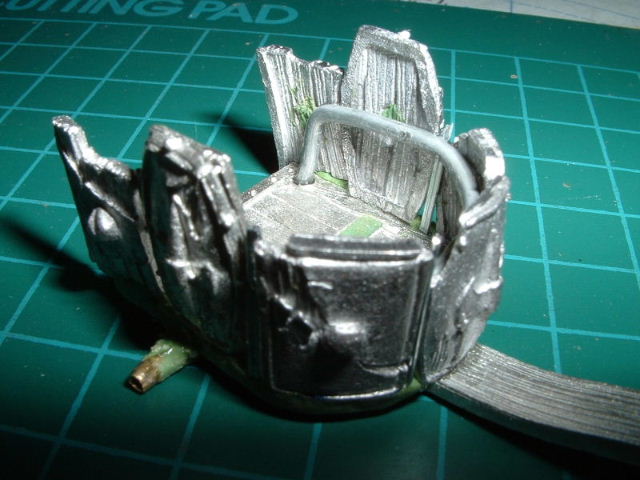
In order to get the new round body, I have to construct a support frame, which can be bend out of some metal wire. In my case, I simply use one big paper clip.
The side frame will be formed out of Fir Bolg shields. These look already battered and give the chariot a nice "second hand" look.
First of all, you have to clean up all parts, that means removing flash and mould lines.
The chariot base comes with a slot to fit the hero model into. Since I intend to use different crew, I decide to fill this slot with greenstuff, using a needle to draw the wood texture into the surface. After the greenstuff has dried, smooth the area with sandpaper. The same goes for the shields, where you have to fill in the depression that is normally used to attach the shield to the arm of the miniature.
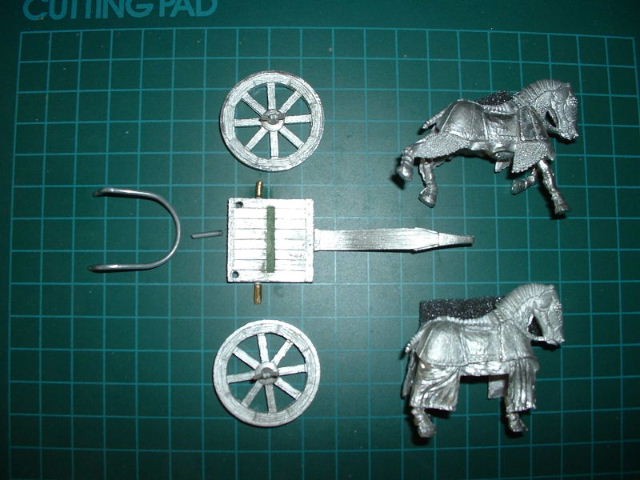
Because the original side panels of the Gael chariot are not used, the axle is too short to take the wheels and has to be lengthened. I use a small piece of brass tube and glue it over the stump of the old axle. Apply a drop of greenstuff to each side to add some strength.
In order to fix the shields on the chassis, I need to bend a wire frame out of the paper clip.

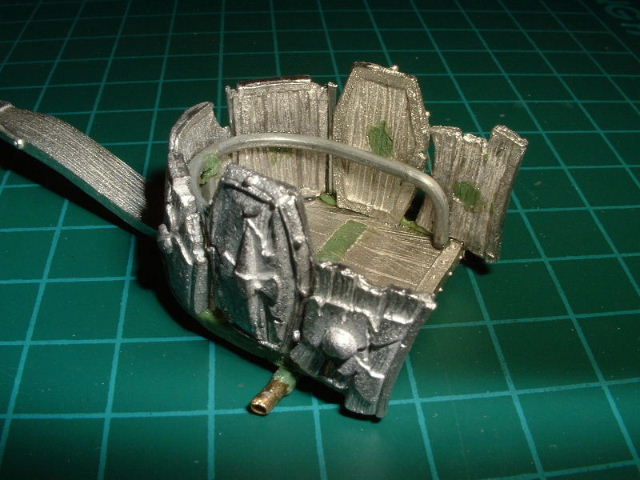
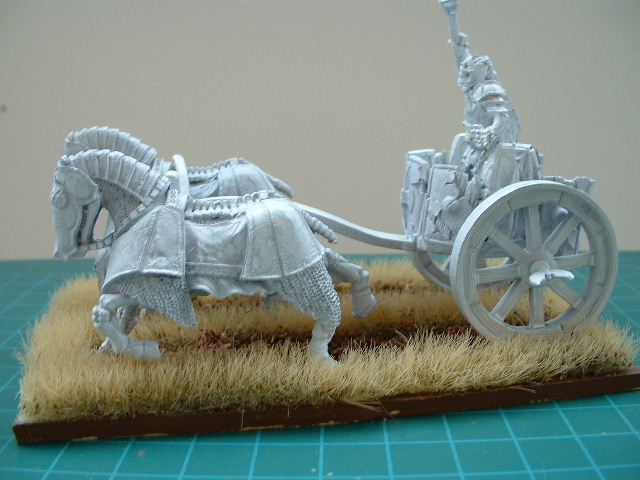
When you have fixed the frame on the chassis, glue the centre shield to the front side. In order to get a proper round body, you have to remove the edges of the base plate. Use the shields as a guideline on how much you have to take away. After you have glued all shields to the body, start smoothing the base with a little greenstuff. After everything has dried well, you can fill in the gaps between the shields with greenstuff or leave them as they are, showing or hiding as much battle damage as you like.
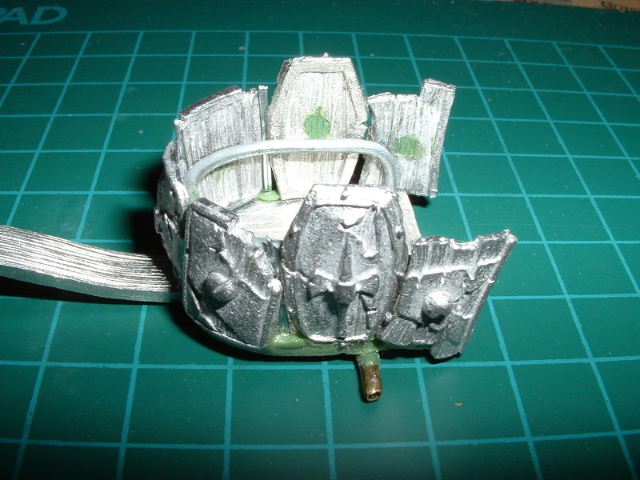
You can prepare the wheels by gluing the scythe blades to them. After you have finished the chassis, you should try out the fit of the wheels by sliding them on the axle. However, I strongly recommend not to glue the wheels in place before painting, as reaching all areas with a brush will become a nightmare then.
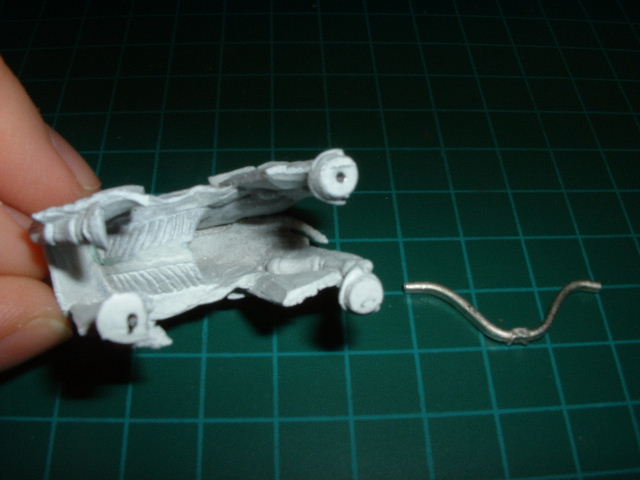
The horses are easy. Just glue both halves of the model together and add a little bit of greenstuff where necessary. Since the Fir Bolg horses are a little bit different in size than the Gael horses supplied with the original model, you have to adjust the drawbar by bending it into a new shape.
While not strictly necessary, I nevertheless strongly recommend to mount the finished model on some kind of base to add stability to it. Without a proper base, you will have to be very careful when moving the chariot around on the table, or you will be forced to re-glue the horses frequently, which is usually not a good thing for the paintjob. For this project, I use a base cut from a plastic sheet. Plastic is light, sturdy and usually doesn't warp, but tends to be on the more expensive side. If you don't want to use plastic, wood or cardboard will also do fine. The base on the picture is already flocked, as I was borrowing it from another (never finished) project.
In order to fix the model on the base, a few drops of glue will work fine in most cases. However, with big and heavy models, a bit of extra stability never hurts.
This is why I decide to pin everything onto the base. Just drill small holes into the base and into the hooves of the horses and the wheels. After that, insert a piece of wire (the pin) into one hole, and connect it to the other hole by gluing everything in place.
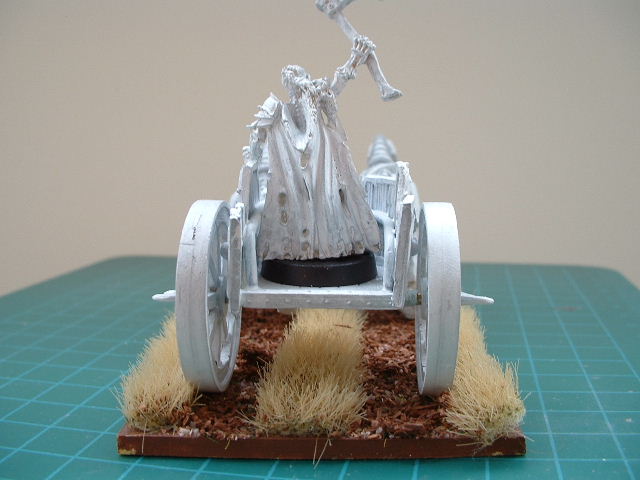
The finished Chariot still needs someone to steer it into combat. Because of the modifications to the body, our chariot will only be able to hold one model. After some thinking, I decide to pick the skeleton leader model as crewmodel.


Now with everything in place, the model is ready for painting…but this is another story for a different workshop.
This page is from: the Celtos Fanpage